Shot Gunner's Log


|
Shot Gunner's Log
|
|
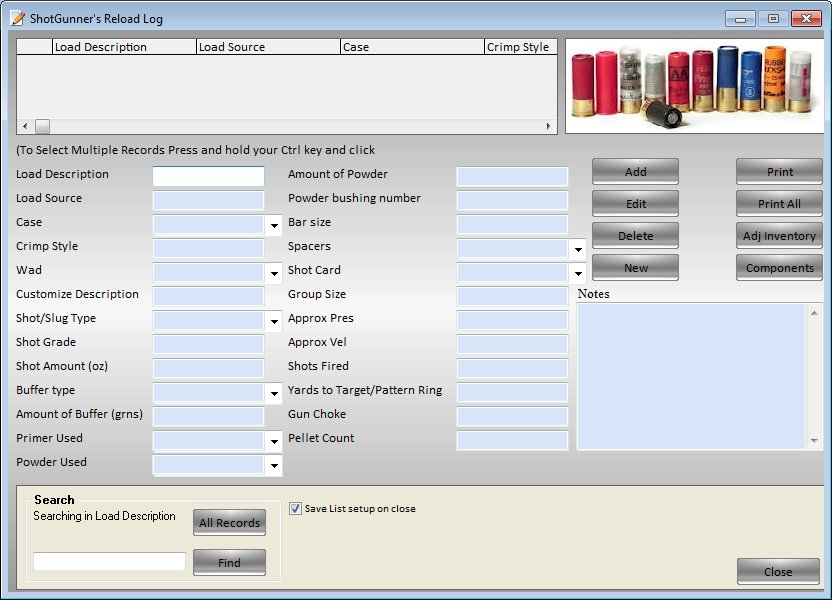
The Shot gunner's log allows you to enter your load data and add components to the inventory log.
To enter a load simply type in the values for the load and click on add.
List boxes have been added to allow you to enter information quickly. To use the list boxes, click on the label next to the input box (your mouse will turn to a rt bent arrow) and select the log and hit OK. Your list will now be filled with all the components in that log and you may select them by clicking on them. To set all of the logs at once click on the set all logs button, and you will be asked to choose the log for each component input one at a time.
(The inventory will be automatically adjusted when you add a new record, if you have adjust inventory on save selected in the main options. This would be when you would encounter items not found and will be given the option to create a new log)
and then asked if you would like to set up the new log...ie add the values for the item. selecting yes will walk you through the inputs for the new item in the same fashion as in the inventory tracker log.
(Hint on setting up logs: if you use the drop down lists set up your logs to reflect what you want in the list ie: Shot, Wads, Powders etc.)
Enter the number of rounds you loaded, and click ok.
You will see a window like the following:
Because of the table structure you cannot add values that include single or double quotes (" or ') these values are reserved in the SQL language and are used to sperate values. So to enter a case such as Active 3" you must use Active 3 inch or Active 3 in etc.
To select multiple records, simply press and hold your Ctrl key and click on the records.
The log can print one or all of your loads, and all printouts are set up to ignore blank values. If you want the input name printed, but do not wish to enter a value, use a dead character such as the colon, then you can write the data in later.
You can set the drop down lists to grab files from a particular log, by clicking on the description next to the input box.
To edit a record, simply type over the existing text and choose edit. The new values will be saved.